How to Replace a Turntable Cartridge: Removal, Mounting and Setup
Published How we research
Replacing a turntable cartridge is one of the most rewarding upgrades you can make, and it is well within reach for most owners with patience and a few small tools. The job involves choosing a cartridge that suits your tonearm, removing the old one, connecting four small wires, bolting the new cartridge to the headshell and then setting alignment and tracking force. This guide goes step by step, flags the points where people most often go wrong and explains which turntables do not allow a cartridge swap at all.
Products from this article
The highest-scoring picks from the buying guides this article links to. Scores are our editorial assessment, not customer ratings.
As an Amazon Associate we earn from qualifying purchases. This does not change our picks. Affiliate disclosure
New to Prime? Try Prime free for fast, free shipping on eligible items.
+ MicroLine stylus reaches deep into grooves for detailed, low-distortion playback
From our guide: Best Cartridge Upgrade Kits (2026)
+ Shibata stylus delivers top-tier detail and very low distortion
From our guide: Best Moving Magnet Cartridges (2026)
+ Baerwald geometry is a widely used standard for low average distortion
From our guide: Best Cartridge Alignment Tools (2026)
+ OFC leads give a clean signal path between cartridge and headshell
From our guide: Best Phono Cartridge Mounting Hardware (2026)
Check whether your turntable allows it
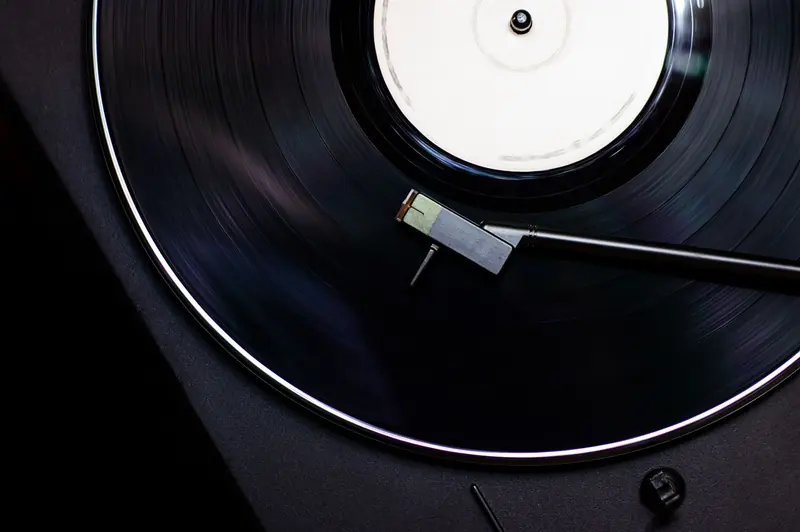
Many mid-range and higher turntables have a removable headshell and a standard cartridge mount, usually with two screws spaced half an inch apart. These accept a wide range of cartridges. Some entry-level decks and all-in-one players use a fixed or proprietary cartridge that is designed for that model only, and only the stylus can be replaced.
Look at the end of the tonearm. If you see a removable headshell with two mounting slots and a pair of small screws holding the cartridge, you can swap it. If the headshell is molded into the arm, check the manual or the maker's website. If unclear, do not force anything, and ask the manufacturer.
Choose a compatible cartridge
Start with your tonearm's requirements. The arm has a recommended range of cartridge weight and a tracking force range. Match the cartridge to those numbers, since a cartridge that is too heavy may not balance with the counterweight, and one that is too light may need extra weight. The arm's manual or the maker's specification page usually lists the ranges.
Then consider the cartridge type. Moving magnet cartridges work with most phono inputs and have replaceable styli. Moving coil types need a phono stage with enough gain or a step-up device. Check the output level and the load recommended by the maker, and confirm that your phono stage supports it. Choosing a cartridge you can service with a replacement stylus helps with long-term ownership.
Gather tools and prepare
You will need a small screwdriver or the screws supplied, a pair of tweezers or fine-nose pliers for the connectors, a stylus gauge, and an alignment protractor. A bright light, a magnifier and a soft cloth help too. Unplug the turntable, remove the platter mat if it gets in the way, and put the stylus guard on the old cartridge if it still has one.
Take photos of the wiring first. The four wires on the back of the cartridge are color-coded, usually white for left positive, blue for left negative, red for right positive and green for right negative, though you should confirm this with your own arm. Photos protect you from mistakes if you get distracted.
Work over a soft surface such as a folded towel, so any dropped screw or tool does not land on the platter or bounce into the arm. Keep fingers away from the stylus, and consider removing the stylus assembly while you handle the cartridge if the design allows it. Take your time, since rushing is the main reason wires and cantilevers get damaged during this job.
Remove the old cartridge
If the headshell is removable, take it off the arm and place it on a soft cloth, which makes the work much easier. Pull the four wire clips gently from the pins on the back of the cartridge, using tweezers if needed. Grip the metal clip and not the thin wire itself, because the wires are delicate and can tear at the join.
Remove the mounting screws and take the cartridge off. Keep the screws and any spacers or washers, since the new cartridge may need them. Do not touch the stylus tip. If the old cartridge has a protective cover, put it on before handling.
Mount and wire the new cartridge
Loosely attach the new cartridge to the headshell with the screws, so it can still slide a little. Many cartridges include screws of various lengths. Choose ones that go all the way through without sticking out too far. Do not fully tighten yet, because the cartridge needs to be moved for alignment.
Reconnect the wires to the matching pins, pressing each clip on straight and gently. Double-check the colors against your photo and the cartridge markings. Then reattach the headshell to the arm. Keep the stylus guard on until everything is in position, and handle the arm with care to avoid hitting the stylus.
If the cartridge screws are very short or too long, ask the cartridge maker or a hi-fi shop for the correct size instead of forcing the ones you have. Some cartridges use threaded inserts, and then the screws go in from the top. Others have plain holes and use a nut underneath. Either way, hold the nut or the cartridge steady so nothing shifts while you tighten.
Align the cartridge and set tracking force
Place an alignment protractor on the platter, lower the stylus onto the marked point and slide the cartridge until its body and the stylus line up with the grid. Tighten the screws a little at a time, checking again between turns. Overtightening can crack the cartridge body, so stop when it is snug.
Next balance the arm and set tracking force with the counterweight and a stylus gauge, following the cartridge maker's range, then set anti-skate. Play a familiar record and check for clean sound in both channels. Replacing a cartridge is also a good time to clean the stylus and the record. If anything sounds wrong, power off and recheck the wiring.
Frequently asked questions
Do I need to buy a new phono preamp after changing cartridges? Not always. A moving magnet cartridge usually works with a standard phono input. Moving coil cartridges typically need a compatible phono stage. Check the maker's specifications.
Will a new cartridge improve the sound? A well-chosen cartridge, correctly aligned, can improve detail and tracking, but the result depends on the rest of your system and your records. Expect a refinement and not a transformation.
Popular right now
- How to Ground a Turntable and Eliminate HumArticle
- How to Align a Phono Cartridge for Accurate TrackingArticle
- RIAA equalization explainedGlossary
- Setting Tracking ForceArticle
- Best Stylus Cleaners for Vinyl (2026)Buying guide
- How to Fix a Turntable Playing Through Only One ChannelArticle
Based on the last 28 days of search and visitor data.